One of the most constant dimensions on any dashboard is the time dimension. The time dimension gives relevance for a metric. In many cases, the same measure gets sliced in different time buckets to be analyzed differently. The time dimension also offers us unique perspectives and opportunities to compare the same metric to different periods of time and helps us try and understand how company performance ties into certain events in the company history and even macroeconomic events to a certain extent.
SAP Lumira Designer (Earlier known as Design Studio) has offered an excellent solution, in being able to visualize KPIs in the form of dashboards and reports. Combined with the powerful features offered by VBX’s Extensions for Lumira Designer, users now can slice and dice data in any manner. Be it cascading filters, period selectors, List boxes, combo boxes etc., this helps the users achieve their view of the data, the way they want to see it.
As for time slicing, there is always the requirement to view data in different time buckets. In many a case, once the time slices become too many, the implementation on the backend becomes more complex because of which, in almost all cases, the requirement for time slices is always found wanting from what is achieved to what is expected.
The average period selector allows users to select multiple months, quarters, years. Certain fixed periods like QTD (Quarter to date), MTD (Month to date), YTD (Year to date), which are essential to make comparisons with last years values are not currently available as stipulated precalculated periods. The task of manually creating these selections and passing filters, lies in the hands of the application developer. However, with the recent releases of VBX, this has been addressed using a dynamic time slicer component.
This dynamic time selector allows the user to slice and dice data, based on a variety of selections. This blog focuses on the features of the time slicer, the different time selections it offers, and a step by step instruction on how to use it.
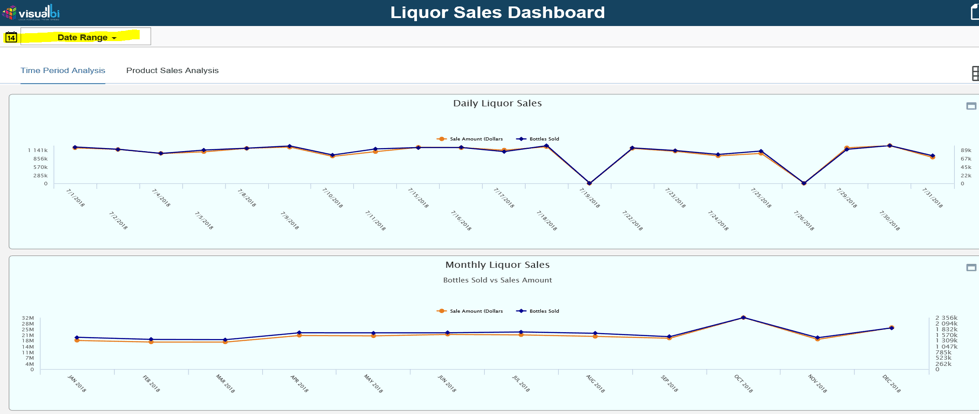
For this example , we have chosen continuous data which goes back a couple of years by date so that we can look at the various scenarios that the time slicer provides. In the image above, the time slicer is highlighted, and the data chosen is also represented by a trendline.
Time Slicer:
Let us look at the various features of the time slicer starting with the date format.
Date Format :
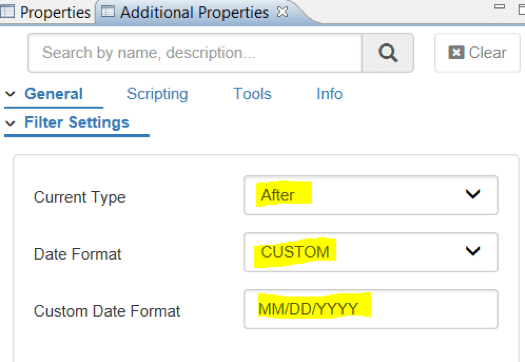
We can customise the Time slicer to return the date format in a specific format that we need it to be in. In this context, passing variables to a data source is sensitive because it can have performance implications. In this example, we have used a HANA source which accepts date in the MM/DD/YYYY format. Accordingly, the time slicer is set to use a custom date format as highlighted below. The component also allows the user to select pre-defined return types in the Date format property.
Another nice feature is the possibility of specifying the type of input, in this case the time slicer has a filter of dates after the given date which is what is set in the screen below.
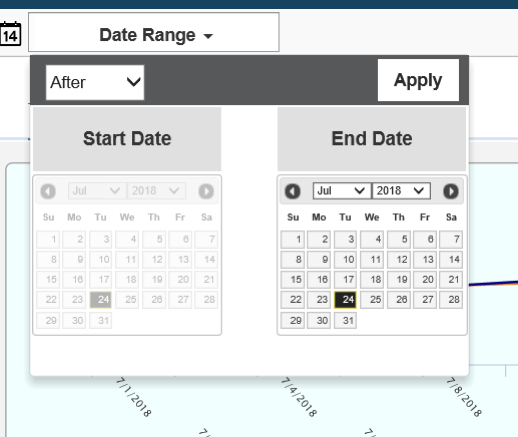
When you expand the component, you are presented with two calendars. The one on the left is used for denoting the ‘from’ date and the one on the right, to denote the ‘to’ date.
Time Slice behavior selection
The time slicer can be setup to perform different kinds of date ranges. In the first example we saw that you could set an “After” option. The other options available are :
- Between
- After
- Before
- Next
- Last
- This
- Period
All these are presented as options in the component set up which can be used to suit your requirement.
Pre-Requisites:
The data source should have a date field– this could come from any source, but a date field is mandatory. As is always with our components– you do not need any additional exits or special variables to achieve this in the backend, the component takes care of passing the input in the required format.
Using scripting, the values can be formatted and passed back to the data source. This is available in the additional properties part of the component where the behavior can be set using script.
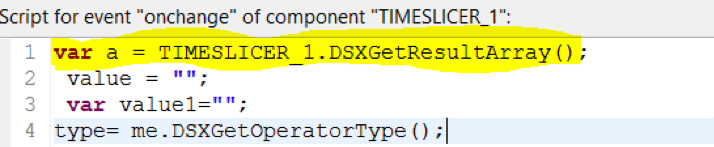
We use the TIMESLICER_1.DSXGetResultArray() API, which returns the values in the form of an array.


The script above is an illustration of how the between functionality can be achieved. The from and to values are fetched using script and then passed as filters to all the necessary data sources.
Similarly, we can leverage scripting to cater to all scenarios and filter data by different time slices. Below is a video highlighting the behavior of the time slicer.
For information on Time Period Selectors, please refer to our blog on Simplifying Time Period Selectors for SAP Lumira Dashboards.